I recently acquired a Sun SPARCstation 10 and not having a CD-ROM drive (and no way to write to the SCSI hard disk in some other way), it was time to look into netbooting (that is, until the SCSI2SD arrives, which should make it possible to emulate a CD-ROM drive and hard disk from a single SD card).
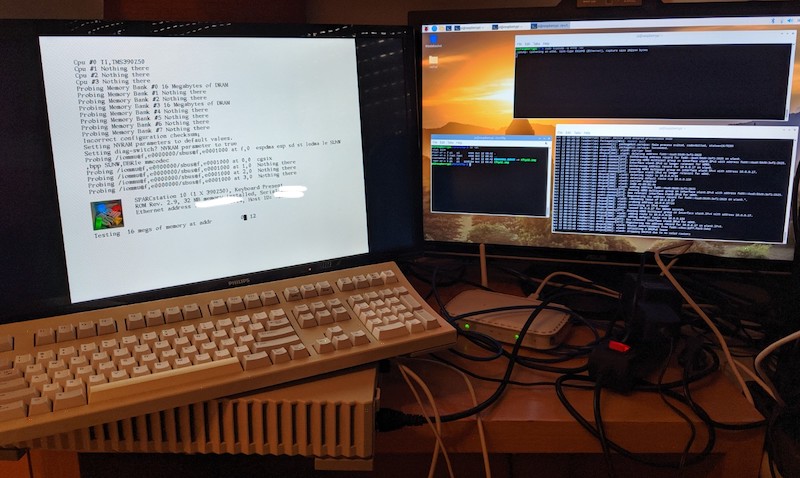
For this, I grabbed a Raspberry Pi 3 (but any SBC or a normal PC would work, of course) and hooked it up via a Ethernet switch to the SPARCstation. The OpenBoot firmware on the machine I got by default tried to netboot, and there is a super useful article here about netbooting: Network Boot Server for SPARC
In my case, instead of using an ancient RedHat release, I wanted to use a recent Debian base, and the Raspberry Pi is perfect for this.
The Pizza Box Computing blog was also helpful, especially the Booting the SPARCstation post.
I also asked a question about the SPARC boot command for SCSI disks on the Unix Stack Exchange. In that regard, the hard disk was not on SCSI ID (3, 0), but on (0, 0), which required this command:
boot /iommu/sbus/espdma@f,400000/esp@f,800000/sd@0,0
I still don't know what the parts of that command mean, so if you know what this cargo-culted incantation means, add your answer to the Unix Stack Exchange question above.
Handing out IPs with rarpd
First order of business is to install rarpd from the repos, so
that the SPARCstation can determine its IP address (based on its
MAC address):
sudo apt install rarpd
You probably also want to configure eth0 on your Raspberry Pi
to manually be e.g. 192.168.0.1. Then, in /etc/ethers, set
an entry for the SPARCstation (I just call it sparcstation here):
08:00:20:xx:xx:xx sparcstation
(where you replace xx:xx:xx with the second half of the MAC
address of the SS10 is shows at boot, the first part is likely
the same)
Then, add entries to /etc/hosts:
192.168.0.1 raspi
192.168.0.2 sparcstation
rarpd will be able to go from 08:00:20:xx:xx:xx to sparcstation
(via /src/ethers) and (via /etc/hosts) to 192.168.0.2, which
is what the SPARCstation will use as its IP address. Start it with:
/etc/init.d/rarpd start
Monitoring network traffic with tcpdump
In order to have a better overview of what's going on, I like to have
tcpdump installed (you can also install Wireshark for a nice GUI):
sudo apt install tcpdump
sudo tcpdump -i eth0 -vv
This way, you should be able to see any requests and communication
between the Raspberry Pi and the SPARCstation. Fire up the SS10 and
wait for it to request files via TFTP (if it doesn't netboot by
default, hit Stop + A and then type boot net). Once it has
acquired its IP address via the Reverse ARP protocol from rarpd,
it should request C0A80002.SUN4M via TFTP (C0A80002 is
192.168.0.2 in hexadecimal notation, if you assign a different IP
to the SPARCstation, the filename will also be different). If you
don't want to observe the requested filename via tcpdump, you can
use Python 3 to convert the dotted decimal IP to the hex string:
>>> '%02X'*4 % tuple(int(x) for x in '192.168.0.2'.split('.'))
'C0A80002'
Next, we need a bootable image.
RedHat 6.2 for SPARC
Grab the RedHat 6.2 ISO from here: redhat-6.2-sparc.iso
Serving files with tftpd
In the RedHat 6.2 SPARC ISO, you will find tftp32.img, which you can rename
(or symlink) to C0A80002.SUN4M. Let's also install (and start) a TFTP server:
sudo apt install tftpd
sudo systemctl start inetd.service
Check in /etc/inetd.conf that the TFTP root is /srv/tftp/, and
copy tftp32.img there as C0A80002.SUN4M (again, a symlink also
works). Restarting the SS10 results in it loading the image to some
degree, but for me it locked up -- oh noes!
Issues with the ARP cache
Looking at the tcpdump output (here it becomes useful!), I could
see that for some reason, the ARP cache on the RPi3 was polluted
(it might have been some device on my network, so it might "just work"
for you). My brute-force way of solving this dilemma was to add the
right ARP entry manually every 2 seconds via the watch(1) command
(in a separate terminal/session, on the Raspberry Pi, and with
xx:xx:xx replaced with the real MAC address, and sparcstation
resolvable to an IP address via /etc/hosts):
watch sudo arp -s sparcstation 08:00:20:xx:xx:xx
NFS/HTTP/FTP -- Getting files to the SPARCstation
Once this booted, the next step was to configure something like NFS.
And NFS was what I tried first, but there were some protocol mismatch
issues, and the RedHat installer also had a HTTP and FTP option. So
I installed Apache2 for serving the ISO content, but the RedHat 6.2
installer image used HTTP/0.9 and some weirdness that Apache2 didn't
understand out of the box (python3 -m http.server also didn't work,
which I tried first, of course).
Not wanting to go hunting for an old, buggy HTTP server or looking into configuring Apache2 to be more backwards compatible (or writing my own small HTTP server, which might have been fun), I went with the next option: FTP.
There are many FTP servers available in the repos. I picked
proftpd. It's easy to configure an anonymous user for it,
and verify its root to be /srv/ftp/. Then, start the server, put
the RedHat 6.2 ISO contents somewhere there (e.g. into a rh62
subfolder of it) and then in the installer use 192.168.0.1 (the
IP address of the RPi3) and /rh62/ as the folder to install from.
Installation
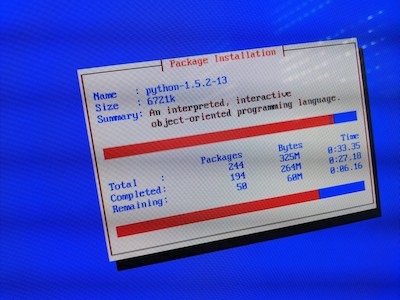
After that, it's just basic, menu-driven installation. The SCSI hard disk in the SS10 here only has 500 MiB, so I needed to pick "custom install" and deselect most packages/tasks (I did install X11 and GNOME) but after 244 packages, 325 MiB and ~ 35 minutes, the installation was done.
Booting Linux
Even though the installer asked to configure Linux for booting,
it only added a linux entry to OpenBoot, but did not set it to
default, but a Stop + A, followed by boot linux made it work,
and after a lengthy boot process, I was greeted by the login screen
and after logging in, was able to play around with the 1990s
incarnation of the GNOME desktop.