With the SPARCstation 10 I acquired recently also came a fitting keyboard, and after some reading online, it turns out it's basically just talking over a serial protocol.
In addition to using it on the SPARCstation, it might also be nice to use the keyboard on any USB HID-compatible machine such as a PC or Raspberry Pi.
Some googling later brought me first to the Sun Type 5 Arduino Adapter project and later to Alexander Vollschwitz' suniversal adapter software + plans which was what I ended up using.
Compared to Alexander's solution, I did not want to modify the keyboard in any way, so that I could still use it on the SPARCstation by just unplugging it from the adapter box.
Step 1: Cleaning the Keys
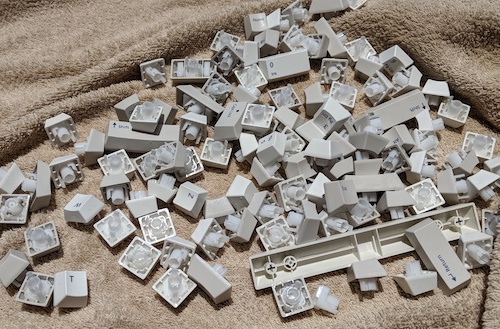
As always when acquiring used HID hardware (keyboards, mice, gamepads) I give the devices some good clean first.
Soaking the keys in warm soap water and then giving them a good rub with a brush worked well here.
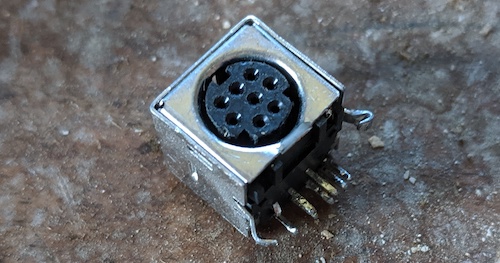
Step 2: Obtaining a Mini-DIN 8 Connector
A combination of not wanting to wait for parts to arrive, having another broken Sun mainboard here for parts and looking for an excuse to try the de-soldering pump that came with the soldering iron, I decided to obtain the required Mini-DIN 8 socket from the Sun Ultra mainboard I had here.

A quick desoldering job was followed by identifying pins using a multimeter, the keyboard-babel website was useful for figuring out which pins are which on the connector.
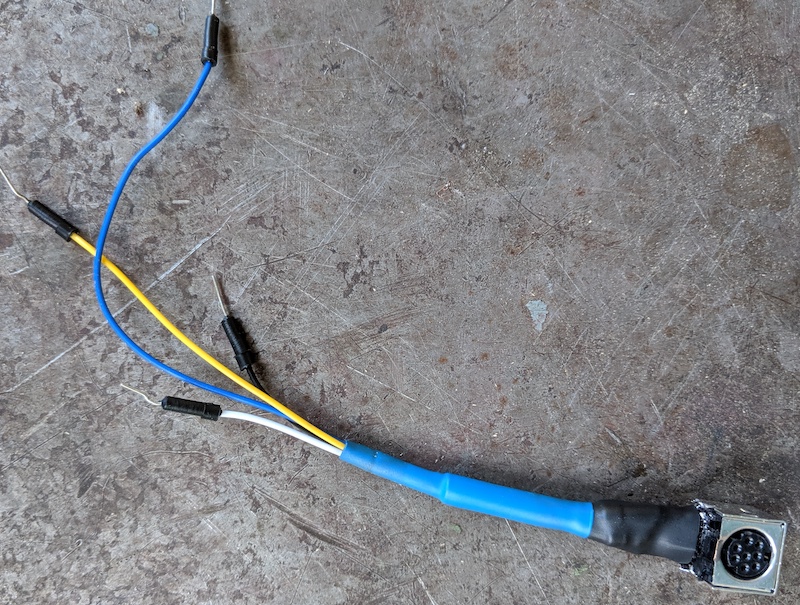
Adding jumper wires and heatshrink left me with the Mini-DIN 8 socket and 4 wires of entertainingly different length (I didn't connect the two serial wires for the mouse, because even though the Sun mouse did come with the keyboard, I rather prefer the trackball I already have for all my GUI pointing needs).
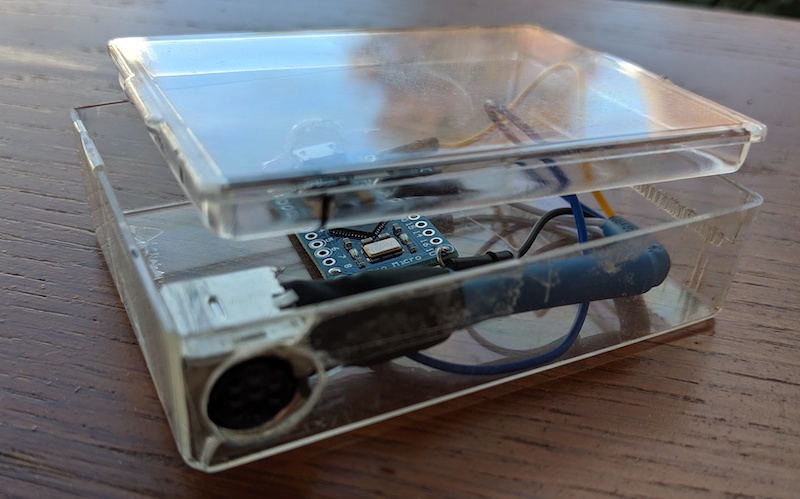
Step 3: Building the Adapter Box
With an Arduino Micro clone from Amazon (one of these cases where you order a "set of 2", and once it arrives you find out that only one of them works and you don't bother sending it back) and the connector I searched around the house for some plastic case to use as the housing (again, could have ordered a nicer case, but I tried to go for as-much-recycling-as-possible this time around).
To glue the board in place, I used some super glue that we had at home, but if I were to do it again, I'd invest in a hot glue gun, which would make it easier and less messy to fix things in place.
Also, the super glue somehow got into the Arduino Micro's Micro USB receptacle (while the USB cable was connected), so now that very USB cable is forever fixed to the adapter box, but it's not like we're running out of Micro USB cables anytime soon.
Step 4: Test Drive
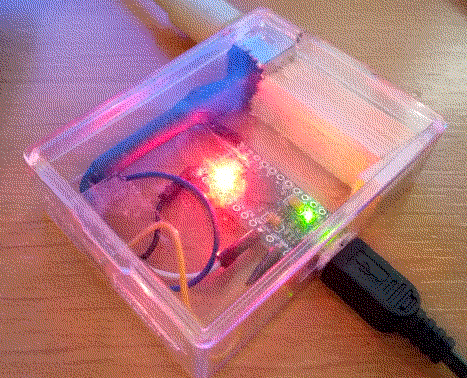
Here's the fully assembled and flashed converter box in action, every time you hit a key the LED blinks, which is fine for now (but might get annoying over time).
Note that I added a small piece of wood to fixate the Mini-DIN socket in place so that the force of plugging in the keyboard is nicely transferred to the outer shell and doesn't move the Mini-DIN 8 socket.
In case of the Micro USB port, since everything is now glued in with super glue, and the USB cable being "glued" into the socket, that also seems to hold up well for now.