(Updated March 2020: This is a project I actually started back in December 2019 and finished in early January 2020, but I never got around to post the photos, so here we go.)
I do have an original PAL PlayStation 1 (SCPH-9002), and while one can run homebrew, out-of-region games and dump the BIOS using the disc swap trick, this is a bit tedious, very timing sensitive and might not be best for the discs or the CD spindle motor in the long run.
These days, there's a neat open source project called PsNee which allows to use an Arduino Pro Mini for a modchip. While probably a bit overkill, it's a more educational project than buying and soldering in a MM3 modchip or something (not to mention the various PS1 emulators on PC and other platforms).
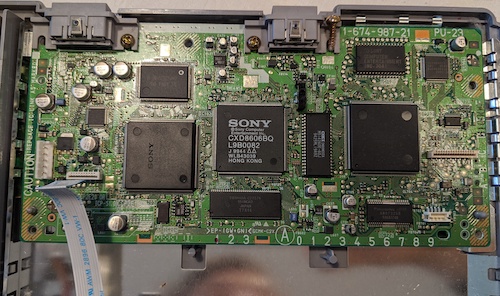
So, here's the PU-23 board in the SCPH-9002 before the operation:
There are some good diagrams included both in the PsNee Git repo as well as William Quade's PU-23 PsNee modchip installation diagram page.
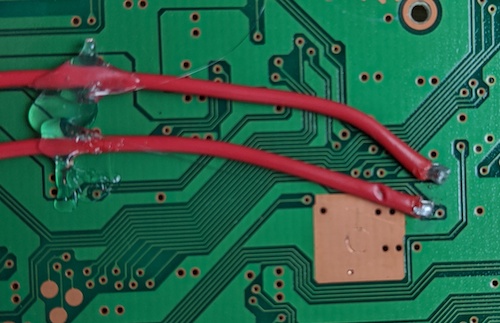
here's my first two solder joints (for SUBQ and SQCK) with much-too-thick wiring (I used some hot glue to protect the solder joints from any pull there might be on the wires during installation):
Next up, on the front, here are the DATA, GATE_WFCK and GND connections soldered in (the VCC connection isn't yet done in this picture):
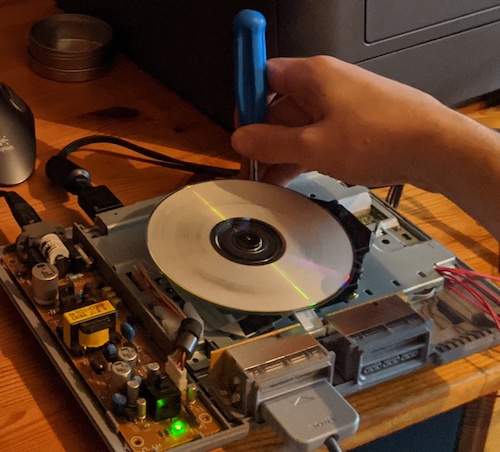
After adding the VCC solder point, labelling the wires and hooking it up to an Arduino Uno, flashing the PsNee firmware with the Arduino IDE, it was time for a first risky test (don't do this at home, or at least never touch the power supply parts and the spinning disc). The screwdriver was used to push down the CD-ROM door button so that the PS1 thinks the disc door is shut. I did not yet have an out-of region PS1 disc (since then, my Japanese version of Wip3out arrived, and it works fine with the PAL console), so I had to resort to a burned disc:
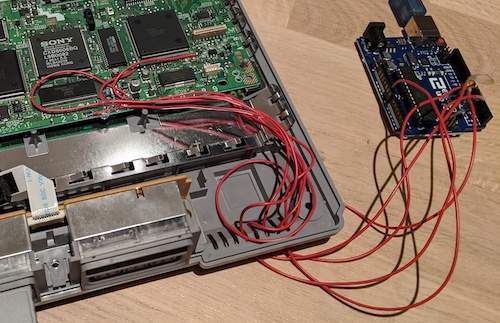
This is how my setup looked. The Arduino Uno used there was only a temporary solution, until the Arduino Pro Mini 3.3V arrived a few days later. For now, I decided to use the grill openings at the bottom front of the console to bring the wires to the Arduino while being able to close the console (you can see the VCC solder point in this shot):
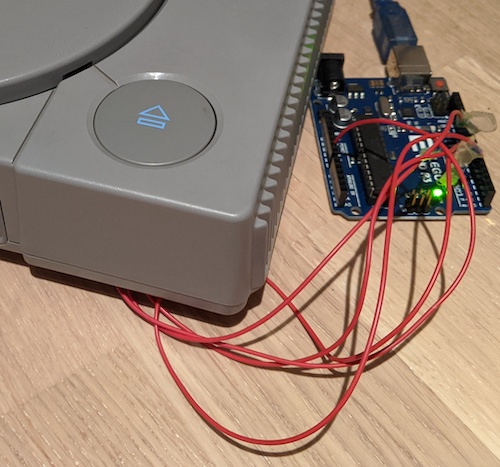
So, with that done, I had my temporary PS1 modchip solution (which needed separate 5V power via a USB wall adapter) that I could also easily disable by not powering up the Arduino:
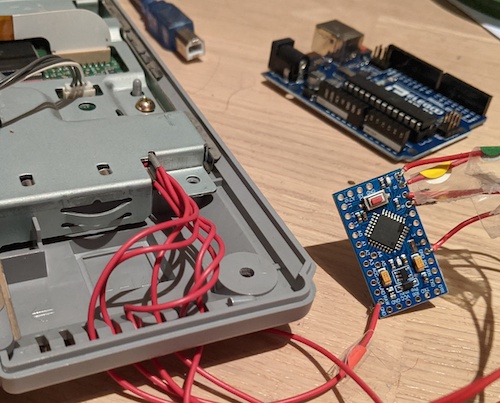
After a few days, the Arduino Pro Mini arrived, so it was time to test it, this time being powered from the 3.3V VCC pin from the PS1 directly, no need for an external power supply (using a 3.3V USB-to-Serial adapter to actually program the Arduino from the IDE):
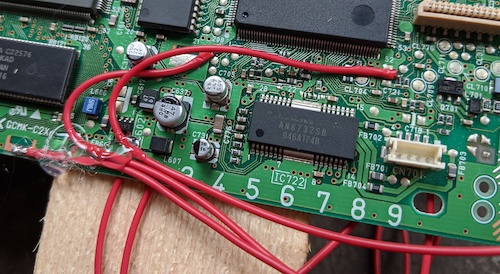
That all worked fine (I did change the PsNee code to always send the "SCEE" signal to speed up booting, no need to make it "universal"). So next up was soldering the wires to the Pro Mini (of course, removing the wires from the front grill outlets of the console so that I could move all of it into the console):

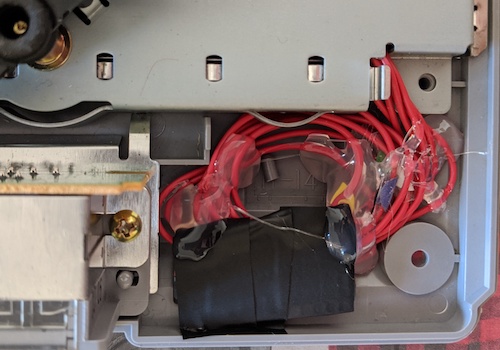
For some reason (lazyness comes to mind), I didn't shorten the wires enough, so there's quite some extra cable length I had to tuck away. I protected the connections on the Pro Mini with some black insulation tape, and some generous use of hot glue made it fit nicely and stay in place:
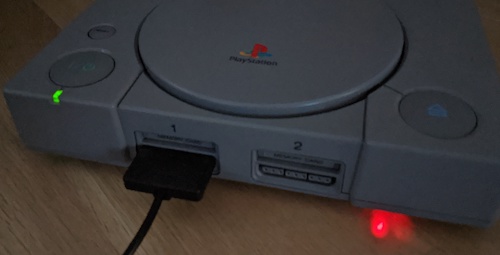
Then finally, after a successful final test if the in-case installation didn't mess with the functionality, it was time to put the case back together, and test it in its final form. As a nice side effect, the LEDs (power LED and "activity" LED), are visible at the front when the console is on, which looks kind of neat, and the activity LED lights up when the injection takes place (so easy to debug in case it breaks in the future):